创建计算节点组和队列
我们之前创建的PCS集群,里面的compute node groups和queues目前全部为空:
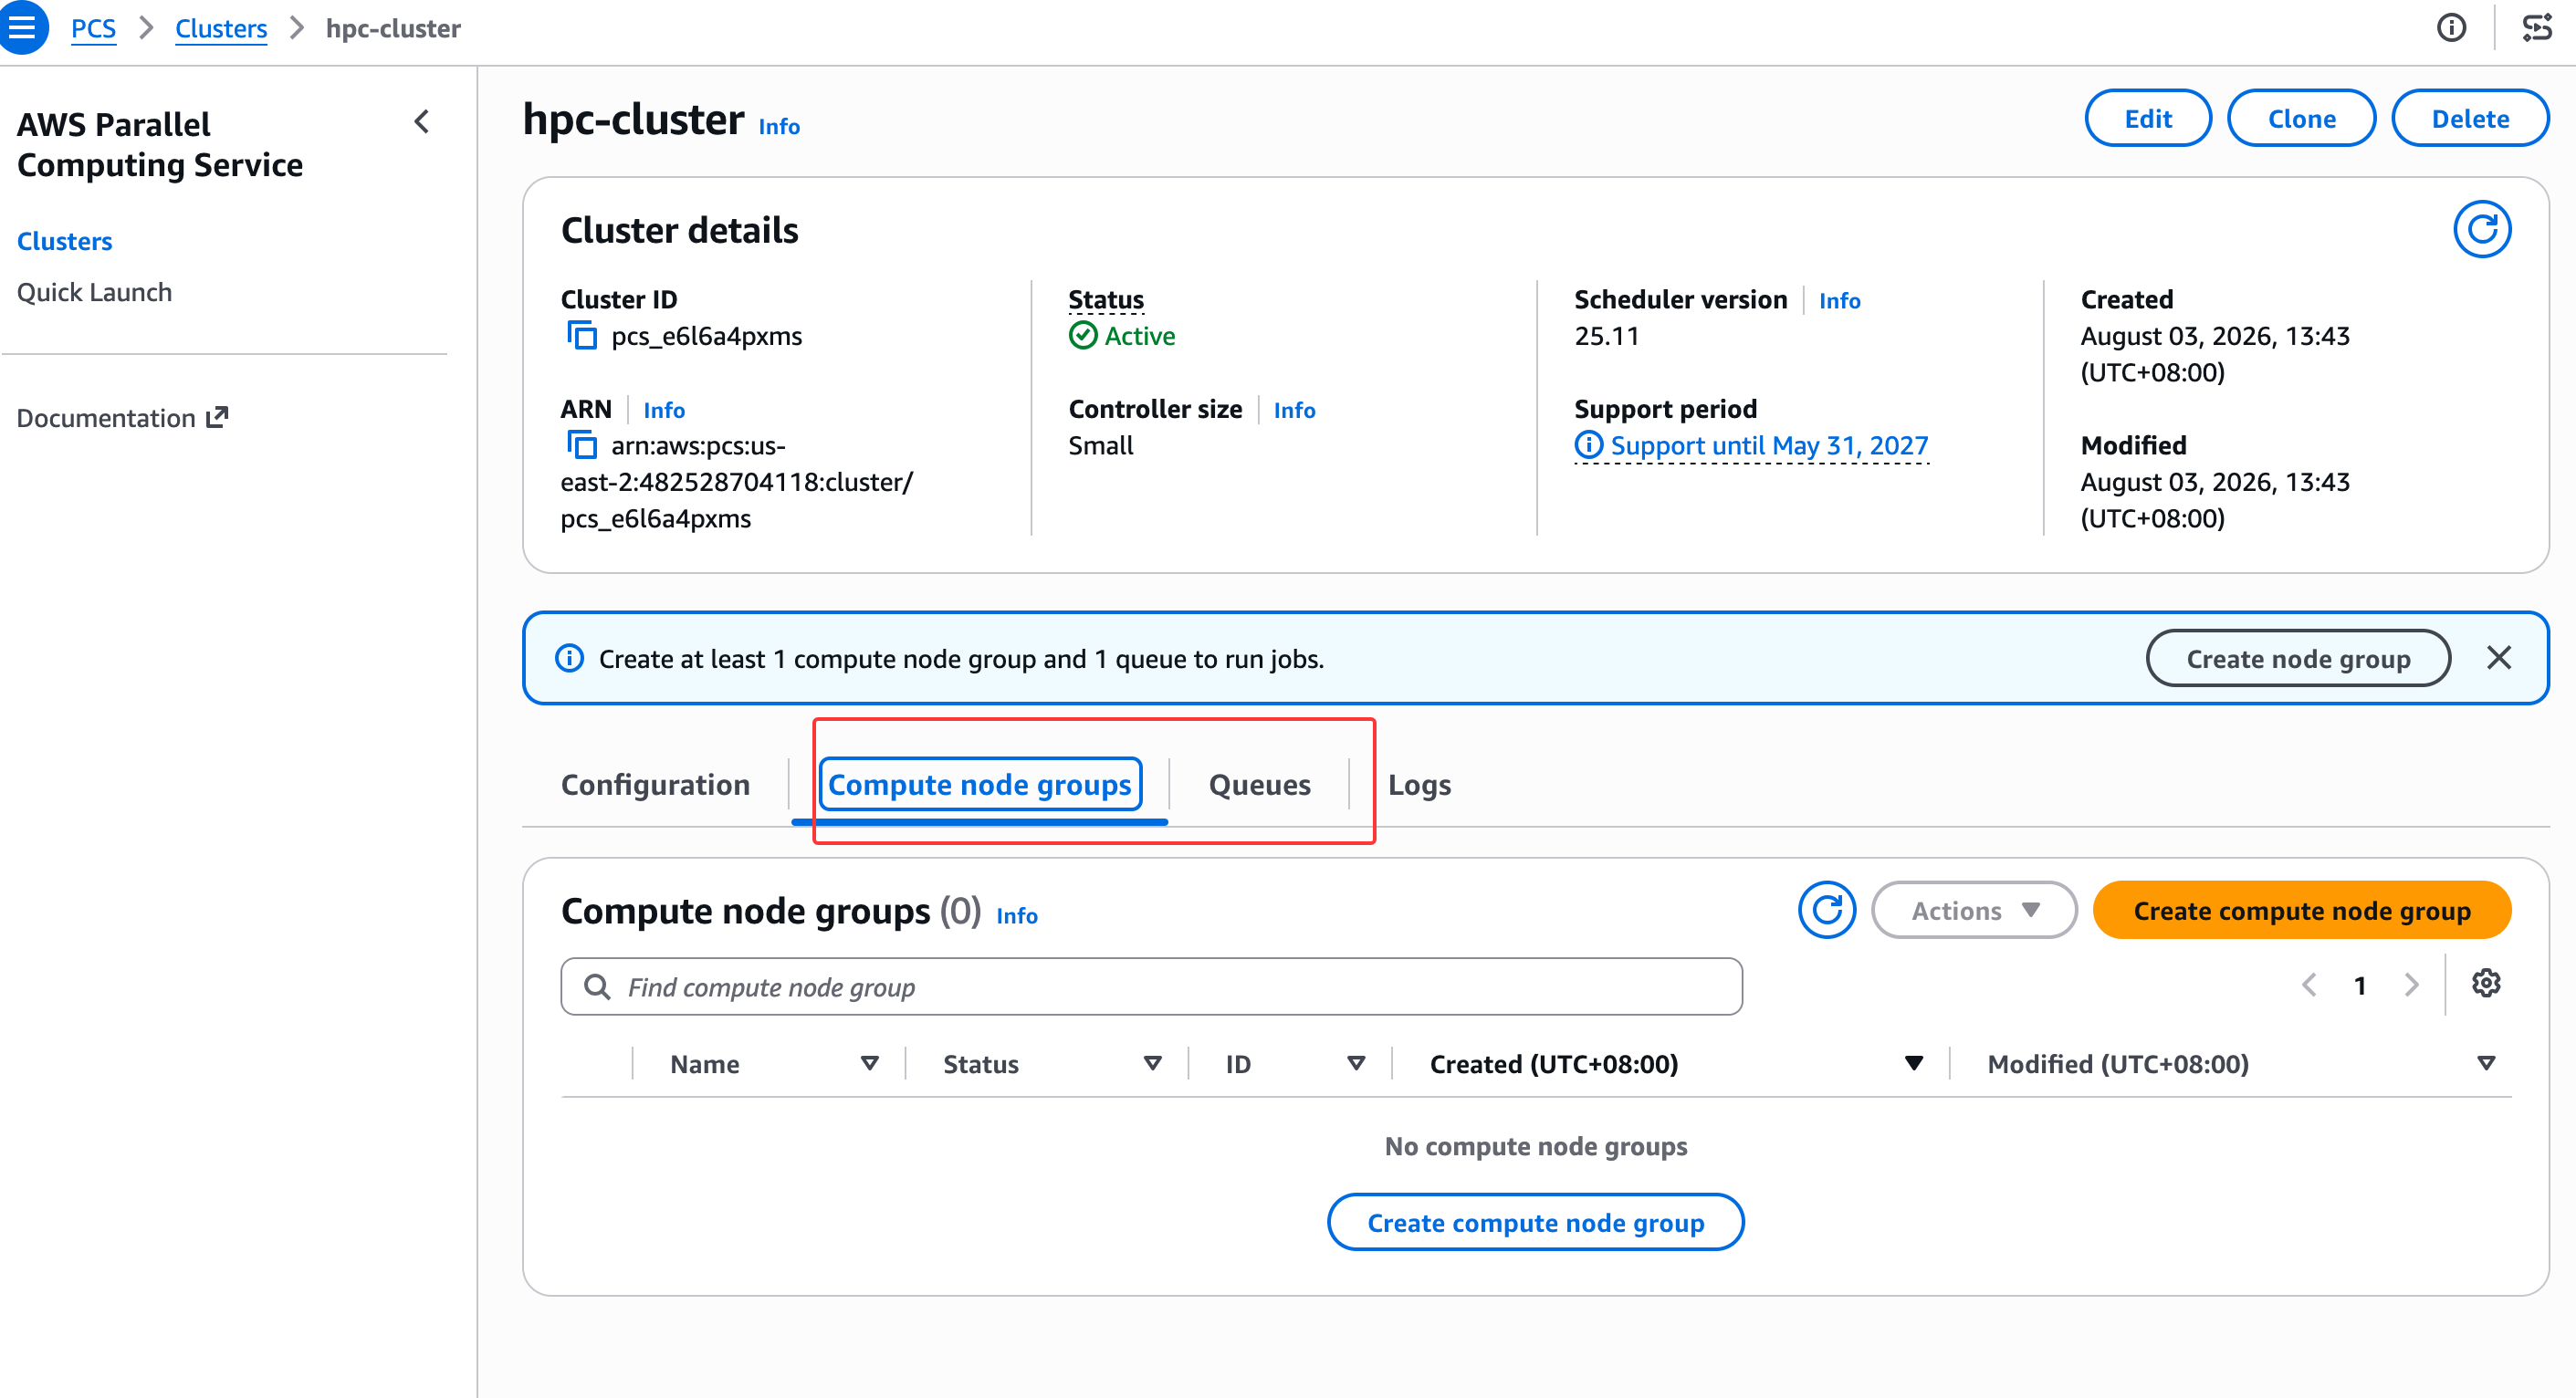
我们将创建一个包含 hpc7a 实例的计算节点组和一个用于作业提交的队列。计算节点组定义了 PCS 可以启动哪些实例,而队列则是用户提交作业的地方。
什么是计算节点组?
计算节点组是一个由 PCS 根据作业需求启动和终止的托管 EC2 实例池。我们需要定义:
- 实例类型 — 使用哪些 EC2 实例(用于 HPC 工作负载的 hpc7a.96xlarge)
- AMI — 包含我们软件栈的机器映像
- 启动模板 — 实例如何配置(网络、存储、用户数据)
- 扩缩边界 — 实例的最小和最大数量
- 购买选项 — 按需、竞价或capacity block
PCS 负责管理生命周期 — 当提交作业时,PCS 会启动实例来运行它。当作业完成且没有更多工作排队时,PCS 会在可配置的超时(默认 600 秒)后终止空闲实例。
什么是队列?
队列(在 Slurm 中称为"分区”)是用户提交作业的地方。每个队列与一个或多个计算节点组关联。当我们运行 sbatch -p <queue-name> 时,Slurm 会将作业路由到关联计算节点组中的实例。
创建计算节点组
获取之前的参数:
export PCS_AMI=$(aws cloudformation describe-stacks \
  --stack-name $INFRA_STACK \
  --query "Stacks[0].Outputs[?OutputKey=='PcsAmiId'].OutputValue" \
  --output text)

export INSTANCE_PROFILE_ARN=$(aws cloudformation describe-stacks \
  --stack-name $INFRA_STACK \
  --query "Stacks[0].Outputs[?OutputKey=='PcsInstanceProfileArn'].OutputValue" \
  --output text)

export HPC_LT_ID=$(aws ec2 describe-launch-templates \
  --launch-template-names hpc-compute-lt \
  --query "LaunchTemplates[0].LaunchTemplateId" \
  --output text \
  --region $AWS_DEFAULT_REGION)

echo "AMI: $PCS_AMI"
echo "Instance Profile: $INSTANCE_PROFILE_ARN"
echo "Launch Template: $HPC_LT_ID"
echo "HPC Subnet: $HPC_SUBNET"
创建计算节点组:
aws pcs create-compute-node-group \
  --cluster-identifier hpc-cluster \
  --compute-node-group-name hpc7a \
  --ami-id $PCS_AMI \
  --subnet-ids $HPC_SUBNET \
  --purchase-option ONDEMAND \
  --custom-launch-template id=$HPC_LT_ID,version=1 \
  --iam-instance-profile-arn $INSTANCE_PROFILE_ARN \
  --scaling-configuration minInstanceCount=0,maxInstanceCount=2 \
  --instance-configs '[{"instanceType":"hpc7a.96xlarge"}]' \
  --region $AWS_DEFAULT_REGION
以下是每个参数的作用:
--cluster-identifier— 此节点组所属的集群。--compute-node-group-name— 节点组的名称。Slurm 将其用作节点命名的一部分。--ami-id— 与 PCS 兼容的 AMI,包含 Slurm :param{key="slurmVersion”}、EFA 驱动程序以及所有必需的软件。--subnet-ids— 实例启动所在的子网。必须与集群位于同一 VPC 中。--purchase-option ONDEMAND— 使用按需实例(无中断)。对于容错工作负载,使用SPOT以节省成本。--custom-launch-template— 启动模板 ID 和版本。$Default表示始终使用默认版本。--iam-instance-profile-arn— 具有pcs:RegisterComputeNodeGroupInstance权限的 IAM 配置文件。角色路径必须为/aws-pcs/。--scaling-configuration—minInstanceCount=0表示空闲时不运行任何实例(弹性扩缩)。maxInstanceCount=2将机群上限设为 2 个节点,足以测试多节点 MPI 作业,同时保持成本可控。--instance-configs— EC2 实例类型。我们可以列出多种类型以获得灵活性。
使用 minInstanceCount=0 时,在我们提交作业之前不会运行任何实例。PCS 按需启动实例,并在空闲超时(默认 10 分钟)后终止它们。这样可以在集群未使用时降低成本。
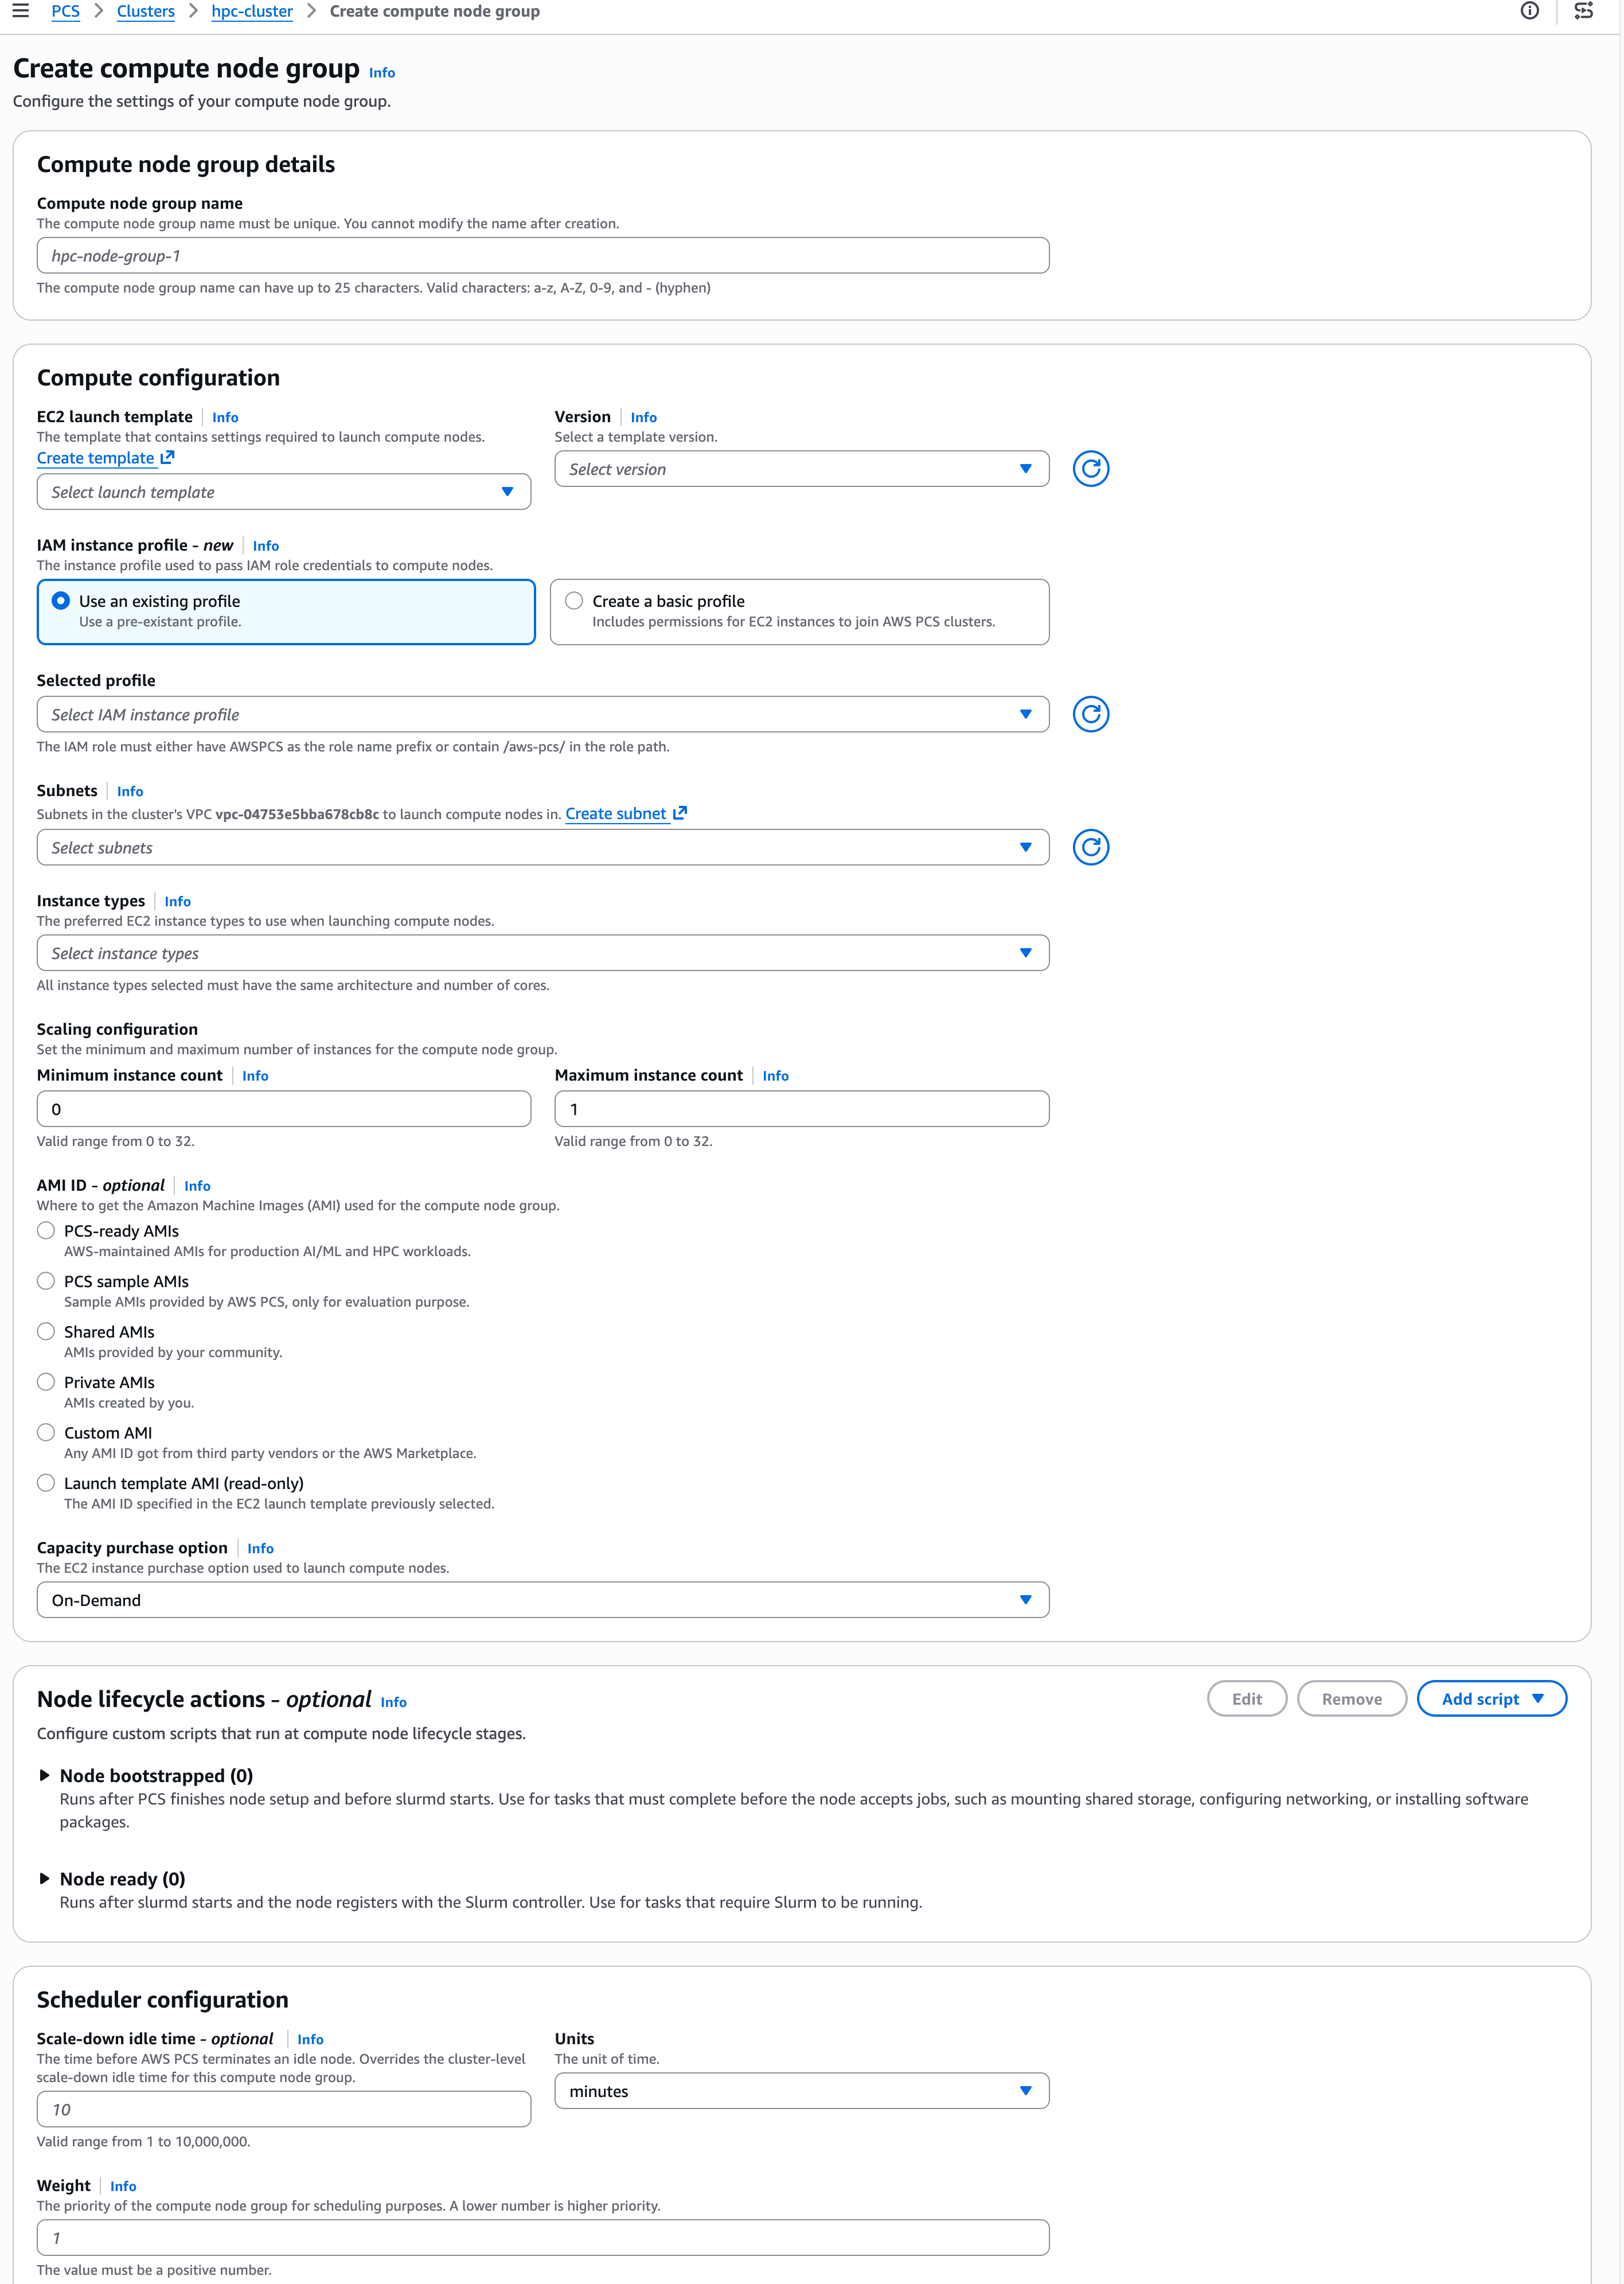
上面的这个命令同样可以在控制台操作:
等待计算节点组变为活动状态
aws pcs get-compute-node-group \
  --cluster-identifier hpc-cluster \
  --compute-node-group-identifier hpc7a \
  --query "computeNodeGroup.{Name:name,Status:status,Id:id}" \
  --output table \
  --region $AWS_DEFAULT_REGION
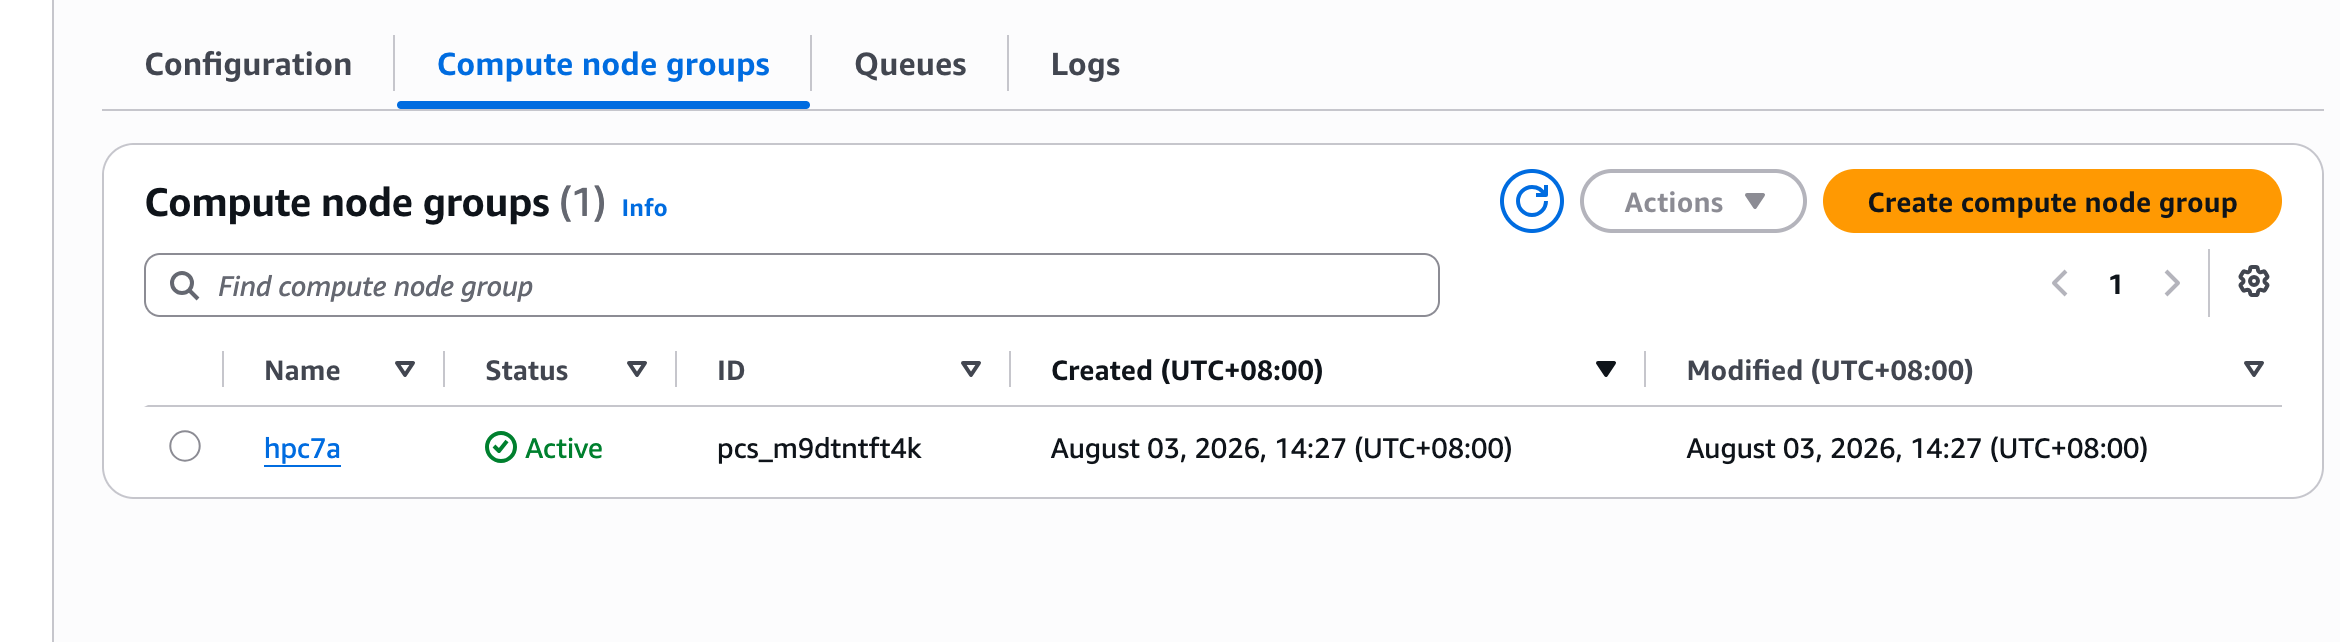
轮询直到状态显示 ACTIVE:
watch -n 10 "aws pcs get-compute-node-group \
  --cluster-identifier hpc-cluster \
  --compute-node-group-identifier hpc7a \
  --query 'computeNodeGroup.status' \
  --output text \
  --region us-east-2"
一旦状态显示 ACTIVE,按 Ctrl+C。
创建队列
一旦计算节点组处于活动状态,获取其 ID 并创建队列:
export CNG_ID=$(aws pcs get-compute-node-group \
  --cluster-identifier hpc-cluster \
  --compute-node-group-identifier hpc7a \
  --query "computeNodeGroup.id" \
  --output text \
  --region $AWS_DEFAULT_REGION)
echo "Compute Node Group ID: $CNG_ID"
aws pcs create-queue \
  --cluster-identifier hpc-cluster \
  --queue-name x86 \
  --compute-node-group-configurations "computeNodeGroupId=$CNG_ID" \
  --region $AWS_DEFAULT_REGION
名为 x86 的队列现在已与 hpc7a 计算节点组关联。当我们向此队列提交作业时,PCS 将启动 hpc7a.96xlarge 实例来运行它。
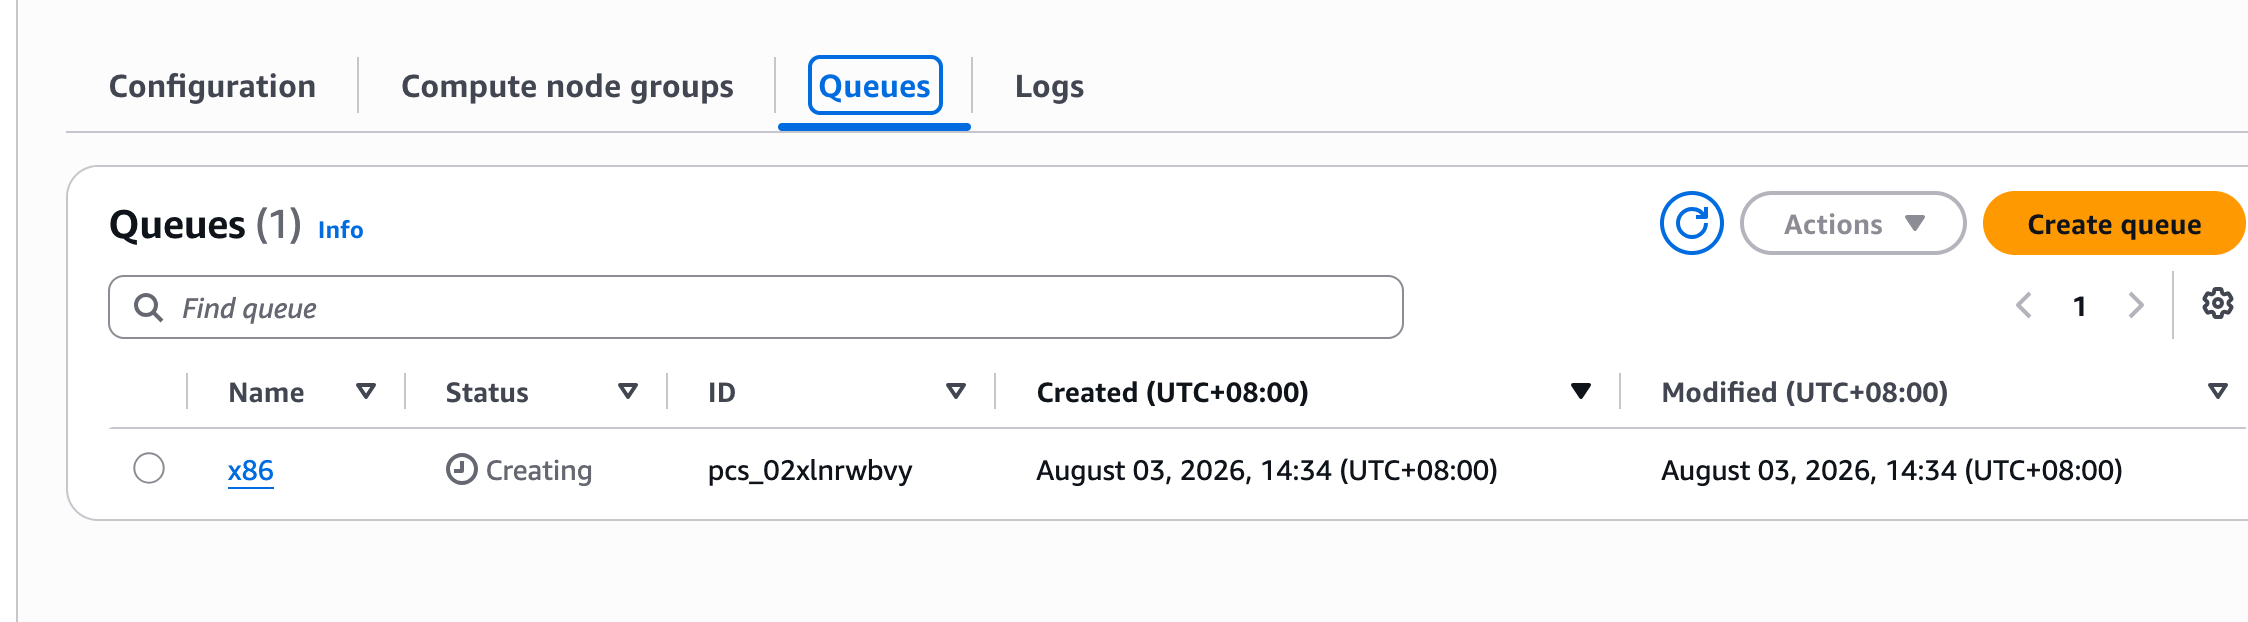
我们现在拥有一个包含 HPC 计算节点组和已准备好用于作业提交的队列的 PCS 集群。目前尚未运行任何实例 — PCS 将在我们提交第一个作业时启动它们。
创建登录节点
我们将创建一个登录节点,用于交互式访问集群。登录节点允许我们通过 SSH 登录、运行 Slurm 命令、提交作业,以及在共享文件系统上处理数据。
PCS 中的登录节点是什么?
在 PCS 中,登录节点只是配置不同的计算节点组:
- 静态扩展 —
minInstanceCount等于maxInstanceCount(通常为 1),因此实例持续运行 - 按需购买 — 没有 spot 中断的风险
- 更便宜的实例类型 — 登录节点不运行计算工作负载,因此我们不需要 HPC 实例
- 无 EFA — 登录节点不参与 MPI 通信
- 相同的文件系统 — 登录节点挂载与计算节点相同的 Lustre 和 EFS,因此我们可以访问共享数据
创建登录节点启动模板
登录节点需要一个比 HPC 计算节点更简单的启动模板 — 没有 EFA,没有放置组,只有文件系统挂载。
export INFRA_STACK="pcs-workshop-infra"
export AWS_DEFAULT_REGION="us-east-2"

export PRIVATE_SG=$(aws cloudformation describe-stacks \
  --stack-name $INFRA_STACK \
  --query "Stacks[0].Outputs[?OutputKey=='PrivateSecurityGroupId'].OutputValue" \
  --output text)

export PUBLIC_SG=$(aws cloudformation describe-stacks \
  --stack-name $INFRA_STACK \
  --query "Stacks[0].Outputs[?OutputKey=='PublicSecurityGroupId'].OutputValue" \
  --output text)

export EFS_ID=$(aws cloudformation describe-stacks \
  --stack-name $INFRA_STACK \
  --query "Stacks[0].Outputs[?OutputKey=='EfsFileSystemId'].OutputValue" \
  --output text)

export FSX_ID=$(aws cloudformation describe-stacks \
  --stack-name $INFRA_STACK \
  --query "Stacks[0].Outputs[?OutputKey=='FsxLustreFileSystemId'].OutputValue" \
  --output text)

export FSX_MOUNT=$(aws cloudformation describe-stacks \
  --stack-name $INFRA_STACK \
  --query "Stacks[0].Outputs[?OutputKey=='FsxLustreMountName'].OutputValue" \
  --output text)

export FSX_DNS="${FSX_ID}.fsx.${AWS_DEFAULT_REGION}.amazonaws.com"

export PUBLIC_SUBNET=$(aws cloudformation describe-stacks \
  --stack-name $INFRA_STACK \
  --query "Stacks[0].Outputs[?OutputKey=='PublicSubnetId1'].OutputValue" \
  --output text)
为登录节点创建user data文件。这比 HPC 计算模板更简单 — 没有 EFA lnetctl 配置,只有标准 TCP 挂载:
cat > /tmp/login-userdata.txt << USERDATA
MIME-Version: 1.0
Content-Type: multipart/mixed; boundary="==//=="

--==//==
Content-Type: text/x-shellscript; charset="us-ascii"
MIME-Version: 1.0

#!/bin/bash

# Mount EFS at /home
echo "${EFS_ID}.efs.${AWS_DEFAULT_REGION}.amazonaws.com:/ /home nfs4 nfsvers=4.1,rsize=1048576,wsize=1048576,hard,timeo=600,retrans=2,_netdev 0 0" >> /etc/fstab
mount /home

# Mount FSx Lustre at /fsx (standard TCP mount, no EFA)
echo "${FSX_DNS}@tcp:/${FSX_MOUNT} /fsx lustre defaults,_netdev,flock,user_xattr,noatime 0 0" >> /etc/fstab
mkdir -p /fsx
chmod a+rwx /fsx
mount /fsx
chmod 777 /fsx

--==//==
USERDATA
登录节点user data不包含 lnetctl EFA 配置。登录节点使用标准 TCP 进行 Lustre 访问,这对交互式使用来说没有问题。EFA 优化的 Lustre 配置仅在运行并行 I/O 工作负载的 HPC 计算节点上才需要。
export KEY_NAME="${KEY_NAME:-ws-default-keypair}"
创建启动模板:
aws ec2 create-launch-template \
  --launch-template-name login-lt \
  --launch-template-data "{
    \"KeyName\": \"${KEY_NAME}\",
    \"MetadataOptions\": {
      \"HttpEndpoint\": \"enabled\",
      \"HttpPutResponseHopLimit\": 2,
      \"HttpTokens\": \"required\"
    },
    \"Monitoring\": {\"Enabled\": true},
    \"NetworkInterfaces\": [
      {
        \"DeviceIndex\": 0,
        \"NetworkCardIndex\": 0,
        \"Groups\": [\"${PRIVATE_SG}\", \"${PUBLIC_SG}\"]
      }
    ],
    \"UserData\": \"$(base64 -w 0 /tmp/login-userdata.txt 2>/dev/null || base64 -i /tmp/login-userdata.txt | tr -d '\n')\"
  }" \
  --region $AWS_DEFAULT_REGION
注意与 HPC 计算启动模板的区别:
- 没有
InterfaceType: efa— 登录节点不需要 EFA - 没有placement group — 登录节点不需要与其他节点物理临近
- 单个网络接口 — 只需要一张网卡
- 附加了公有 SG — 通过公有子网的 NAT/IGW 为节点提供出网路径;使用者通过 Systems Manager Session Manager 连接,而不是直接 SSH(SG 中没有开放入站的 22 端口)
验证启动模板已创建:
aws ec2 describe-launch-templates \
  --launch-template-names login-lt \
  --query "LaunchTemplates[0].{Name:LaunchTemplateName,Id:LaunchTemplateId,Version:LatestVersionNumber}" \
  --output table \
  --region $AWS_DEFAULT_REGION
我们应该看到一行,其中 Name: login-lt 且 Version: 1。
创建登录节点计算节点组
获取所需要的参数值
export PCS_AMI=$(aws cloudformation describe-stacks \
  --stack-name $INFRA_STACK \
  --query "Stacks[0].Outputs[?OutputKey=='PcsAmiId'].OutputValue" \
  --output text)

export INSTANCE_PROFILE_ARN=$(aws cloudformation describe-stacks \
  --stack-name $INFRA_STACK \
  --query "Stacks[0].Outputs[?OutputKey=='PcsInstanceProfileArn'].OutputValue" \
  --output text)

export LOGIN_LT_ID=$(aws ec2 describe-launch-templates \
  --launch-template-names login-lt \
  --query "LaunchTemplates[0].LaunchTemplateId" \
  --output text \
  --region $AWS_DEFAULT_REGION)

aws pcs create-compute-node-group \
  --cluster-identifier hpc-cluster \
  --compute-node-group-name login \
  --ami-id $PCS_AMI \
  --subnet-ids $PUBLIC_SUBNET \
  --purchase-option ONDEMAND \
  --custom-launch-template id=$LOGIN_LT_ID,version=1 \
  --iam-instance-profile-arn $INSTANCE_PROFILE_ARN \
  --scaling-configuration minInstanceCount=1,maxInstanceCount=1 \
  --instance-configs '[{"instanceType":"c7a.xlarge"}]' \
  --region $AWS_DEFAULT_REGION
与 HPC 计算节点组的关键区别:
--compute-node-group-name login— 描述性名称--scaling-configuration minInstanceCount=1,maxInstanceCount=1— 静态扩展,始终运行 1 个实例--instance-configs c7a.xlarge— 更便宜的实例类型,足以用于交互式使用
等待登录节点变为活动状态
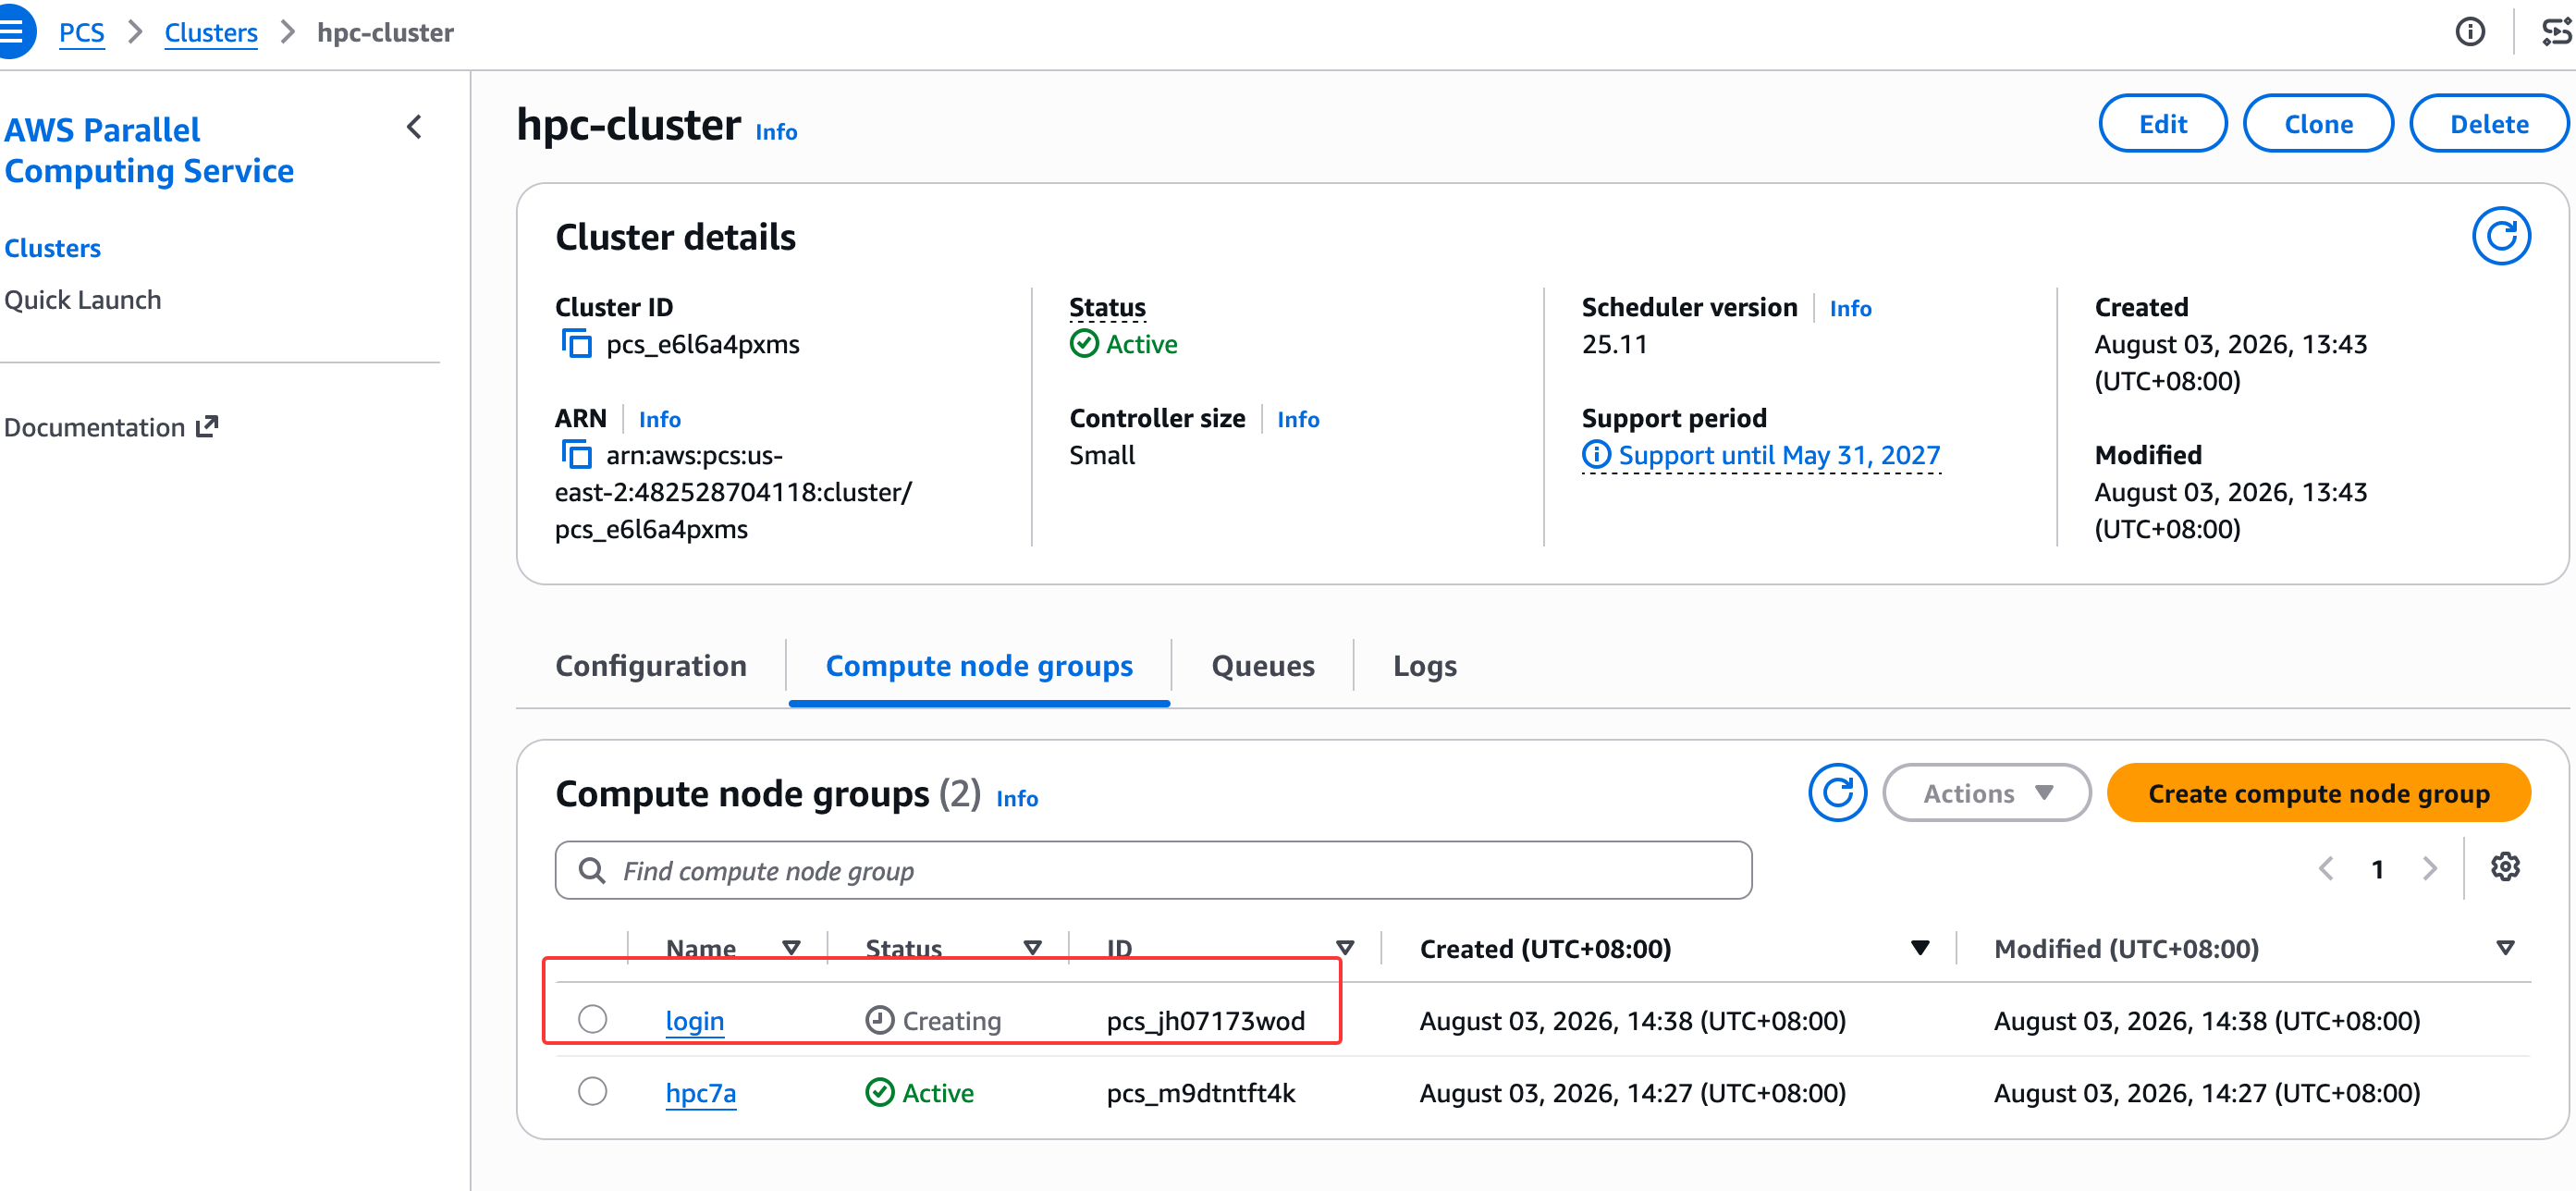
我们最初应该看到 Status: CREATING。与 HPC 计算节点组(其 min=0,在提交作业之前不会启动实例)不同,登录节点的 min=1,因此 PCS 现在正在启动一个 EC2 实例。
轮询直到它变为 ACTIVE:
watch -n 10 "aws pcs get-compute-node-group \
  --cluster-identifier hpc-cluster \
  --compute-node-group-identifier login \
  --query 'computeNodeGroup.status' \
  --output text \
  --region us-east-2"
一旦状态显示 ACTIVE,按 Ctrl+C。这通常需要 2-3 分钟。
连接到登录节点
一旦登录节点组处于活动状态,PCS 就开始启动 EC2 实例。实例可能还需要一分钟才能达到 running 状态并完成其启动序列。
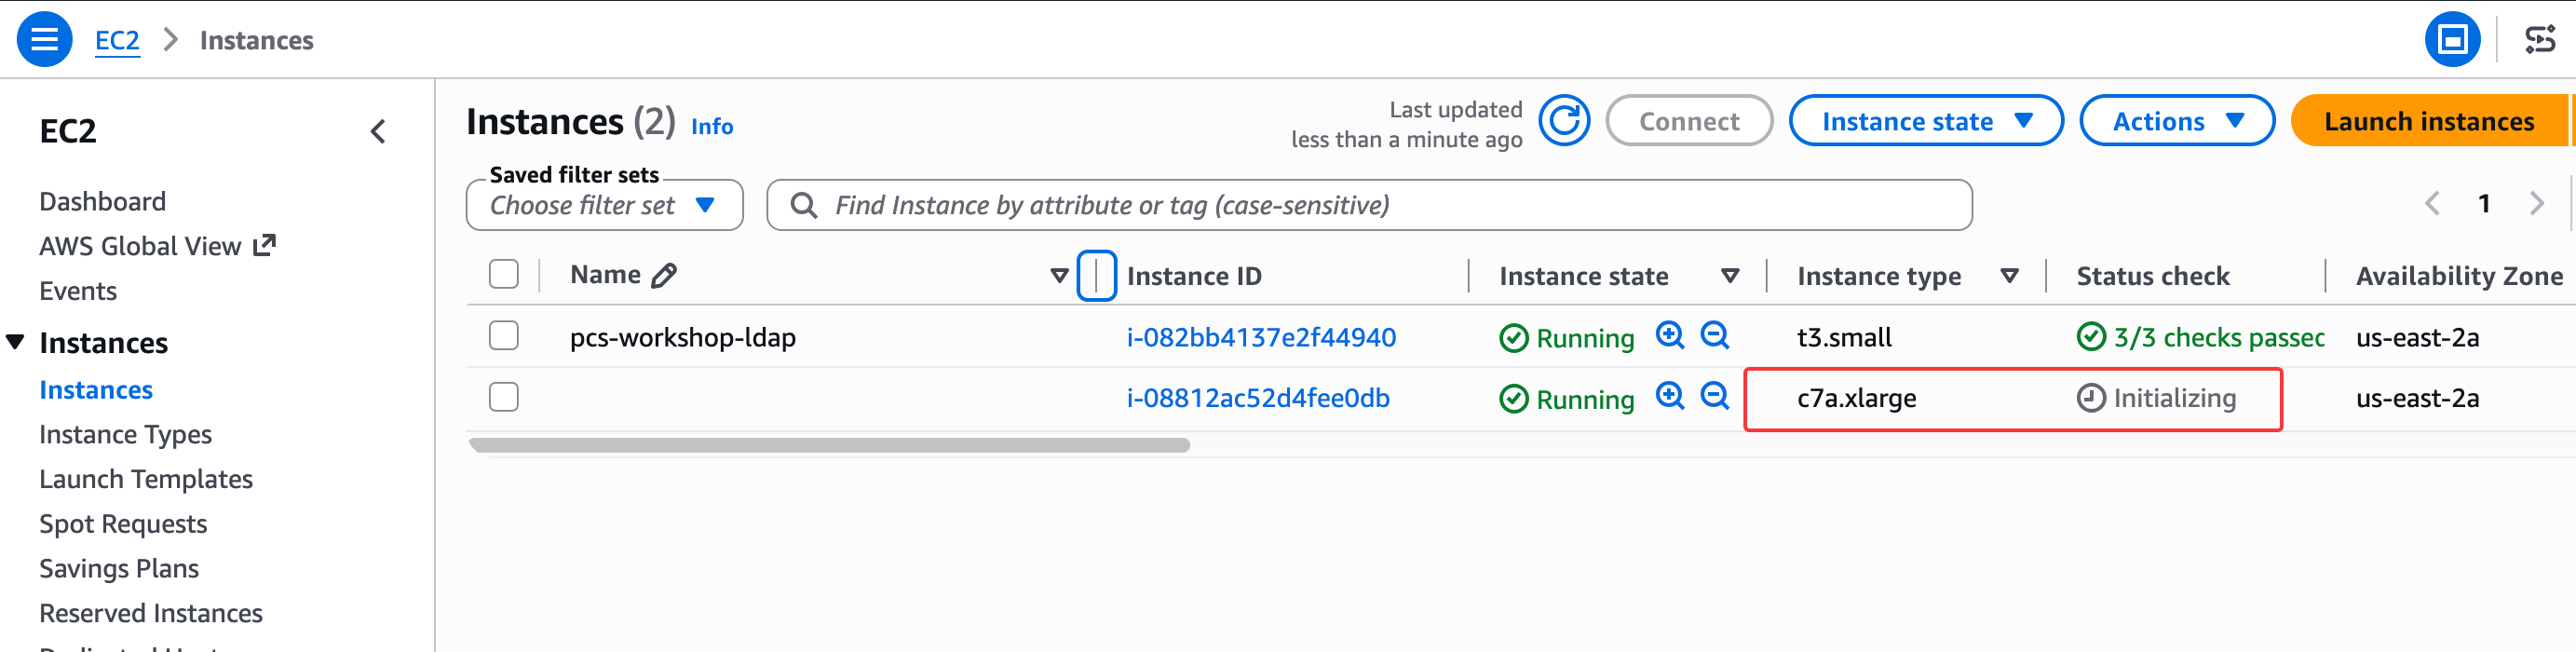
查找登录节点实例:
# Wait for the instance to reach running state
while true; do
  LOGIN_INSTANCE=$(aws ec2 describe-instances \
    --filters "Name=tag:aws:pcs:compute-node-group-id,Values=$(aws pcs get-compute-node-group \
      --cluster-identifier hpc-cluster \
      --compute-node-group-identifier login \
      --query 'computeNodeGroup.id' \
      --output text \
      --region us-east-2)" \
    "Name=instance-state-name,Values=running" \
    --query "Reservations[].Instances[].InstanceId" \
    --output text \
    --region us-east-2)
  if [ -n "$LOGIN_INSTANCE" ]; then
    echo "Login instance ready: $LOGIN_INSTANCE"
    break
  fi
  echo "Waiting for login instance to start..."
  sleep 10
done
通过 Systems Manager Session Manager 连接:
aws ssm start-session --target $LOGIN_INSTANCE --region us-east-2
连接后,切换到 root 以访问 Slurm 命令和管理工具:
sudo su -
SSM Session Manager 以 ssm-user 身份连接我们,该用户的 PATH 中没有 Slurm。运行 sudo su - 切换到具有完整环境的 root。对于生产集群,我们会改为以 LDAP 用户身份 SSH 登录。
验证 Slurm 正在工作
从登录节点运行 Slurm 命令以验证集群正在运行:
sinfo

我们应该看到 x86 分区,其中 hpc7a 节点处于 idle~ 状态(~ 表示节点已关闭电源,将按需启动)。
squeue
这应该显示一个空的作业队列 — 尚无作业运行。

我们现在有了一个登录节点,可以交互式访问 PCS 集群。我们可以从这里运行 Slurm 命令、访问共享文件系统以及提交作业。
验证存储
我们将验证两个共享文件系统是否已正确挂载在登录节点上,并了解它们的配置方式。
PCS 集群使用两个共享文件系统:
| 文件系统 | 挂载点 | 用途 | 性能 |
|---|---|---|---|
| Amazon EFS | /home |
用户主目录 — 在节点扩缩容期间持久保留 | 适用于小文件、元数据密集型工作负载 |
| FSx for Lustre | /fsx |
HPC 临时/共享数据 — 高吞吐量并行 I/O | 针对大型顺序读/写进行优化 |
两者都通过实例启动时的启动模板user data进行挂载。预先部署的安全组已允许所需的网络流量(EFS 的 NFS 端口 2049,Lustre 的端口 988 和 1018-1023)。
df -h /home /fsx
我们应该会看到类似以下的输出:

/home显示 8.0E(艾字节)— 这是 EFS 弹性存储,会随着使用而增长/fsx显示 1.2T — 这是 1200 GiB 的 FSx Lustre 文件系统
了解挂载选项
检查每个文件系统的挂载方式:
mount | grep -E "home|fsx"

EFS 挂载选项:
nfsvers=4.1— NFSv4.1 协议rsize=1048576,wsize=1048576— 1 MB 的读/写缓冲区大小,用于提升吞吐量hard— 在服务器故障时无限重试(比soft更安全)timeo=600— 重试前 60 秒超时_netdev— 在挂载前等待网络就绪
Lustre 挂载选项:
flock— 启用文件锁定(许多 HPC 应用程序需要)user_xattr— 启用扩展属性noatime— 禁用访问时间更新(减少元数据开销)_netdev— 在挂载前等待网络就绪
测试文件操作
向每个文件系统写入一个测试文件:
# 测试 EFS (/home)

echo "Hello from the login node" > /home/test-efs.txt
cat /home/test-efs.txt
# 测试 Lustre (/fsx)

echo "Hello from Lustre" > /fsx/test-lustre.txt
cat /fsx/test-lustre.txt
检查 Lustre 文件系统统计信息
lfs df -h /fsx
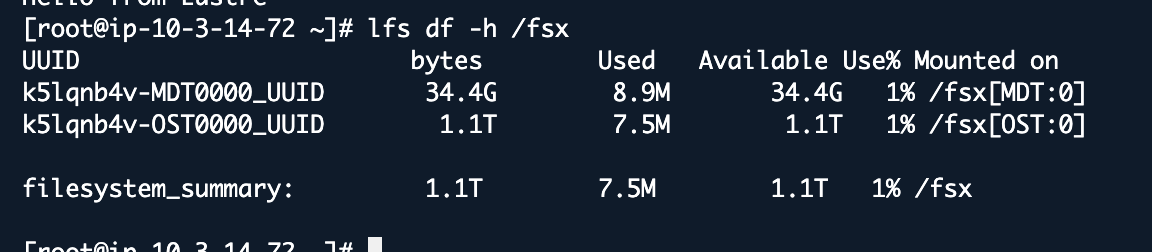
这将显示按存储目标(OST)细分的 Lustre 文件系统容量。
两个文件系统均已验证并正常工作。在登录节点上写入的文件将在作业运行时可从计算节点访问。接下来,我们将设置 LDAP 多用户访问。